SFTP Export - PuTTY Key Generation Utility
This topic outlines the steps to be followed when using the PuTTY Key Generation utility for generating Public / Private key files for using in the OPERA SFTP module.
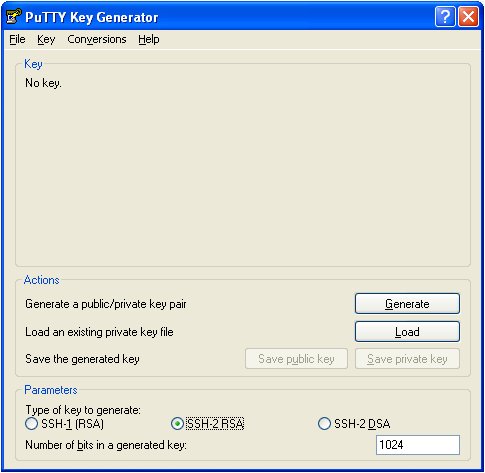
1. When the “puttygen.exe” executable is run, the initial screen looks like the below.

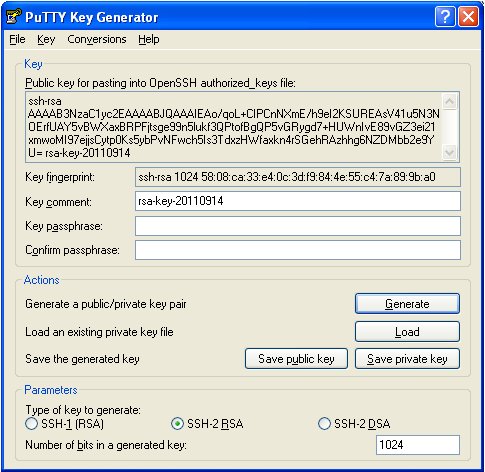
2. Use the “Generate” button to generate a new public/private key pair.
3. Once the key is generated, the screen looks like the below.

4. Use the “Save public key” button and save the public key to the file system. Choose any desired name for the public key, use a file extension that will help identify that this is the public key. For example, “demo.pub”.
5. Use the “Key passphrase” field and “Confirm passphrase” fields to enter a password to protect the private key file which will be created in the next step below.
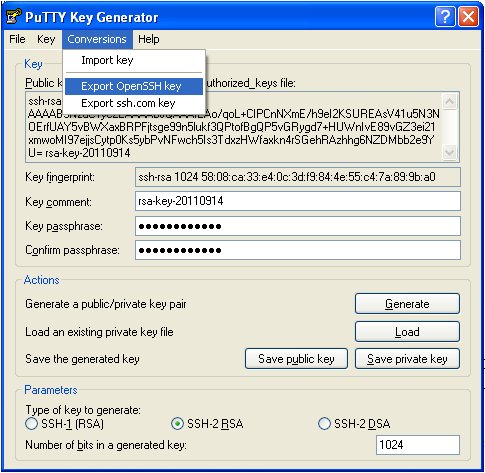
6. Use the menu option “Conversions > Export OpenSSH Key” (refer to screenshot below) to save the private key in the standard RSA format. Choose the same name for the private key as the one previously chosen for the public key, but a different file extension. Use a file extension that will help identify that this is a private key file that is in the standard RSA format. For example, "demo.pri" (Instead of using this menu option, if you use the “Save private key” button, the file will be saved in the putty format with an extension of ppk. This will not work in the OPERA SFTP module).

7. Upload the “demo.pub” public key file to the SFTP server which will be the ultimate destination for the files created by the OPERA export module.
8. Upload the password protected “demo.pri” private key file into OPERA using the “Delivery Config” screen within the OPERA export module.
See Also