Applying a Benefit E-Certificate to a Reservation
This topic details the steps for applying a benefit e-certificate (that has a benefit rate code attached) to a reservation. The configuration process consists of three parts:
Part 1: Configuring a Benefit Rate Code and Attaching it to an E-Certificate
Part 2: Issuing the E-Certificate to a Profile
Part 3: Applying the Benefit E-Certificate to a Reservation
Prerequisites
Before beginning, ensure the following application settings are active and user permission is granted:
Part 1: Configuring a Benefit Rate Code and Attaching it to an E-Certificate
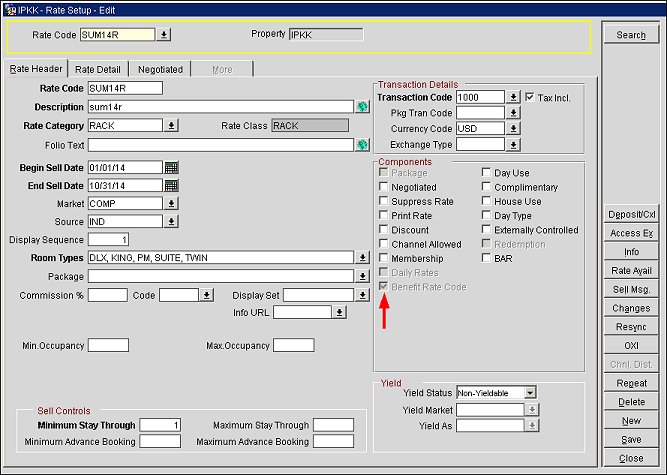
- On the Rate Setup screen (Configuration > Rate Management > Rate Classifications > Rate Codes), select the Benefit Rate Code option for the rate code you want to designate as a benefit rate code and attach to the e-certificate.
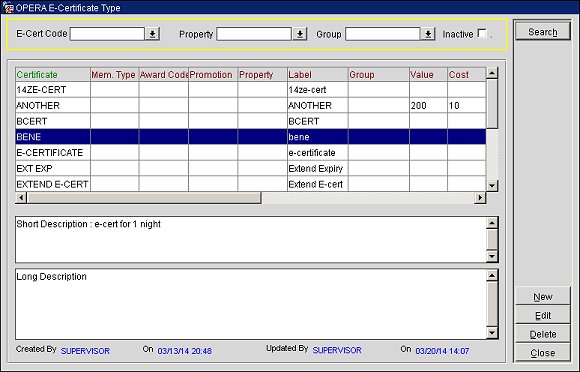
- On the E-Certificate Type screen (Setup > System Configuration > Profile > E-Certificate > E-Certificate Types), highlight the e-certificate you want to attach the Benefit Rate Code to and select the Edit button.
- On the E-Certificate Type - Edit screen, select the Benefits check box (this will activate the Benefits button).
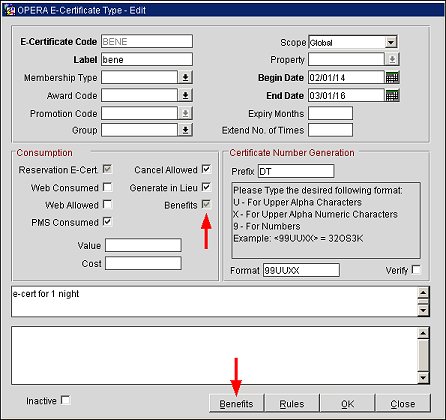
- Select the Benefits button. On the Opera Benefits screen, select the Rate Code down arrow and choose a benefit rate code from the LOV.
- In the Number of Nights field, enter the number of night's stay for which the e-certificate with the rate code benefit will apply. For example, if there is a reservation for 5 nights, a "3" in this field would indicate that the e-certificate can only be applied to 3-nights of the stay. In this scenario, the guest will pay for the remainder 2 nights of the stay.
- Select Save.
Part 2: Issuing the E-Certificate to a Profile
After configuring the benefit rate code and attaching it to an e-certificate, the next step is to issue the e-certificate to a profile.
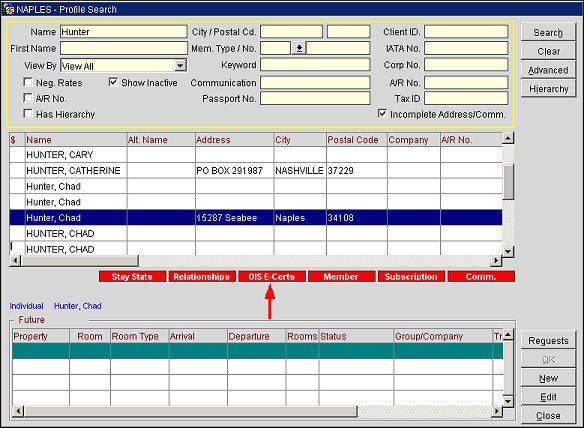
- On the Profile Search screen (Profiles > Search), enter the name of the profile to issue the e-certificate to and select the Search button. Highlight the profile in the results grid and select the OIS E-Certs indicator lamp. This opens the OPERA E-Certificate screen.
Note: The "OIS E-Certs" indicator lamp will only display if the profile already has an e-certificate attached. If the profile you are issuing the e-certificate to does not have an e-certificate already attached, you can attach one by going to Profiles > Edit > Options > OCIS E-Certs and selecting an e-certificate.
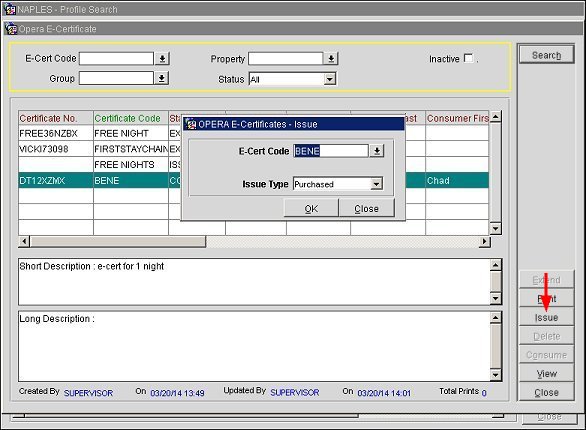
- On the OPERA E-Certificate screen, select the Issue button and choose an e-certificate from the E-Cert Code LOV and choose an Issue Type. Select OK to issue the e-certificate.
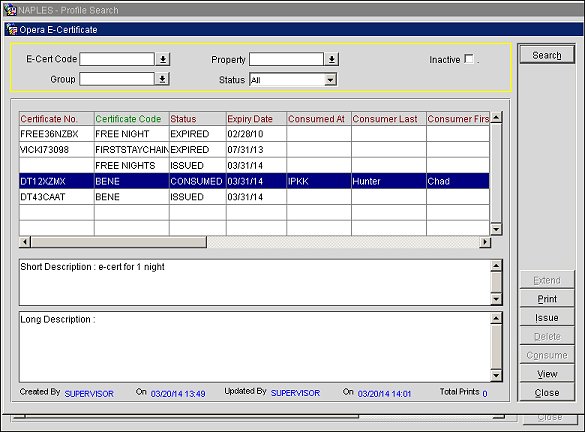
The OPERA E-Certificate screen now indicates that the "BENE" e-certificate has been issued to the profile.
Part 3: Applying the Benefit E-Certificate to a Reservation
In the final part, you will apply the e-certificate to the reservation so it can be consumed.
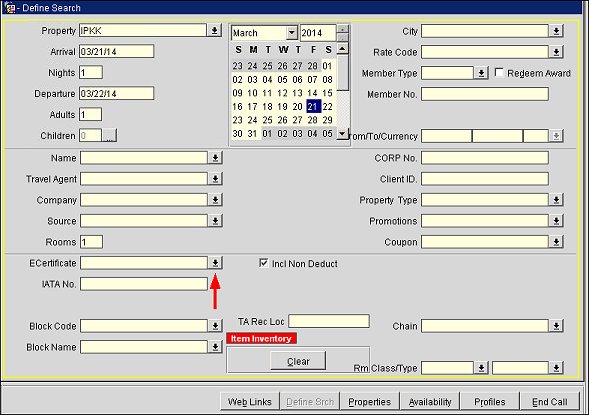
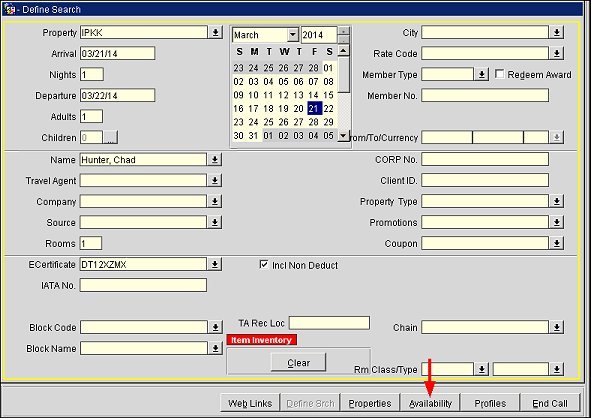
- On the ORS Sales - Define Search screen (ORS > Sales Screen > New), enter a name (a profile with an e-certificate already attached), property, arrival/departure dates, number of nights, number of adults, etc. Select the ECertificate down arrow.
- On the OPERA Benefits screen, choose the e-certificate with the benefit rate code attached and select the Select button.
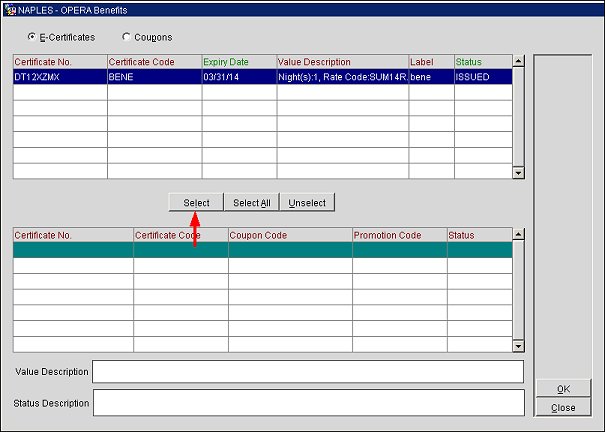
- The e-certificate will display in the lower pane indicating that it has been selected for the reservation. Select OK to return to the Define Search screen.
- On the ORS Sales - Define Search screen, select the Availability button.
- On the Rate Availability screen, select a rate/room type.

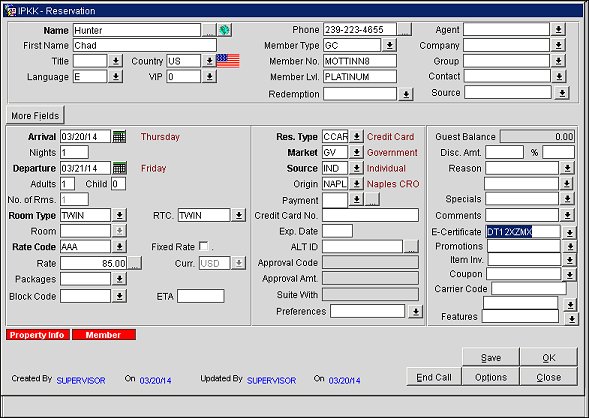
- On the Reservation screen, enter a name for the reservation, reservation type, market code, source code, etc.
Note: The e-certificate selected from the previous steps displays in the E-Certificate field.
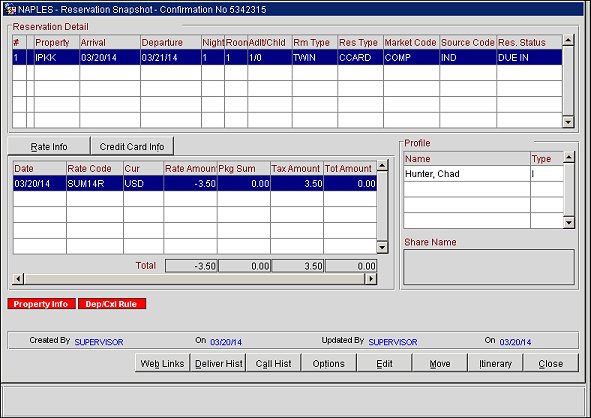
- Select OK to finish the reservation. The Reservation Snapshot screen and closing script screens will display.
Consume Benefits
Rate Header Tab
E-Certificate Types
Issuing E-Certificates
